How to Use Embed3D
Create interactive 3D step-by-step guides with annotations and positioning controls.
Step-by-Step Instructions
Upload Your 3D Model
Embed3D accepts GLB and GLTF files up to 50MB. Free users can upload up to 5 assets. Simply drag and drop your 3D file or click to browse.
Create Your First Step
Click "Add Step" to begin creating your step sequence. Position the 3D model exactly where you want it for this step. Your changes will autosave automatically.
Add Annotations and Details
Enhance each step with explainer text and annotations directly on the 3D object. Use the isolation tool to focus on specific parts, or add other tools as needed.
Navigate and Control Your Model
Move the object using right-click (or two-finger click on trackpad). Use the re-center action to reset the view, or click "Revert Orientation" to return a step to its original saved position.
Duplicate and Refine Steps
To duplicate a step, select it and click the "New Step" action. This creates a copy that you can modify, making it easy to build complex step sequences.
💡 Pro Tips
- Steps autosave, so you can work confidently without worrying about losing progress
- Each step can have its own unique position, annotations, and explainer text
- Use the isolation tool to highlight specific components of complex models
- The "Revert Orientation" button is helpful when you need to return to a step's original camera angle
Claude MCP Integration
Use Claude (Desktop or claude.ai) to manage your Embed3D projects, draft lessons, and queue annotations and assessments — all from chat.
✅ Before you begin
The connector links Claude to an existing Embed3D workspace — it can't create one for you. So start here:
- Create your free Embed3D account first. Sign up for Embed3D → It takes a minute, and it's the account Claude will connect to.
- Then connect Claude using the steps below. At the Approve access step you'll sign in with the account you just created, and Claude only sees that workspace.
- Already started in Claude? No problem — when you reach Approve access, sign in (or create your account) there, then come back and finish connecting.
Connect Claude to Embed3D
👥 On a Claude Team or Enterprise plan? Read this first
Custom connectors can only be added by a workspace admin/owner. On Team and Enterprise accounts, a regular member can't add the Embed3D connector. Contact your admin, and have them review the instructions below.
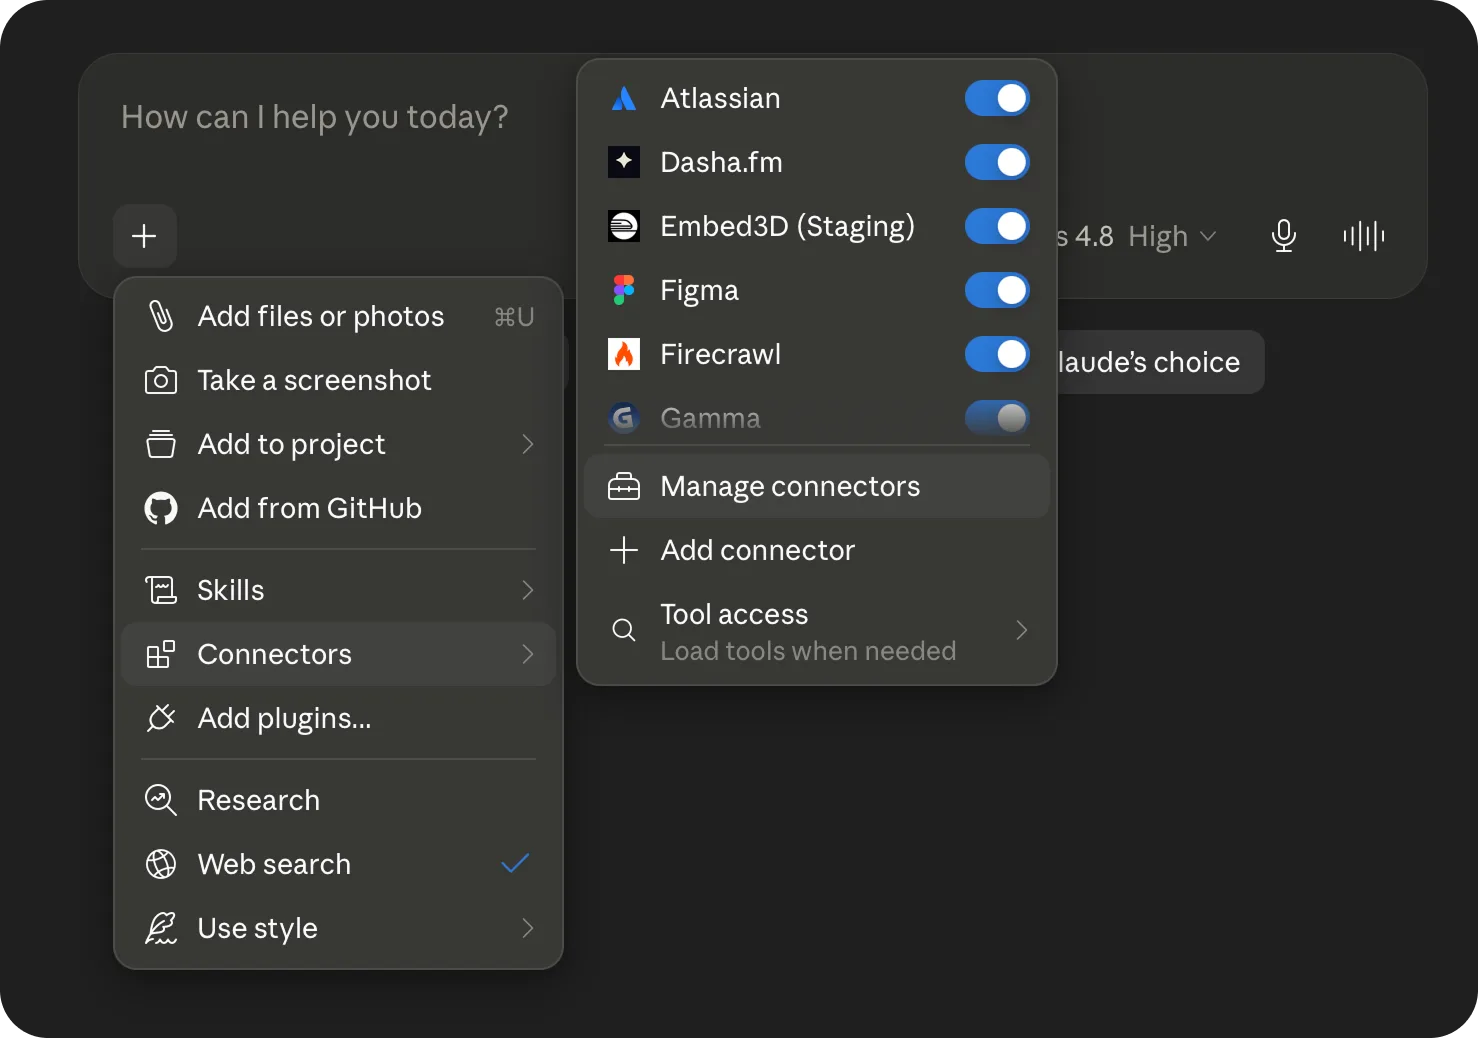
Open Claude's connectors menu
In Claude Desktop or claude.ai, click the + button in the message box, then choose Connectors → Manage connectors.
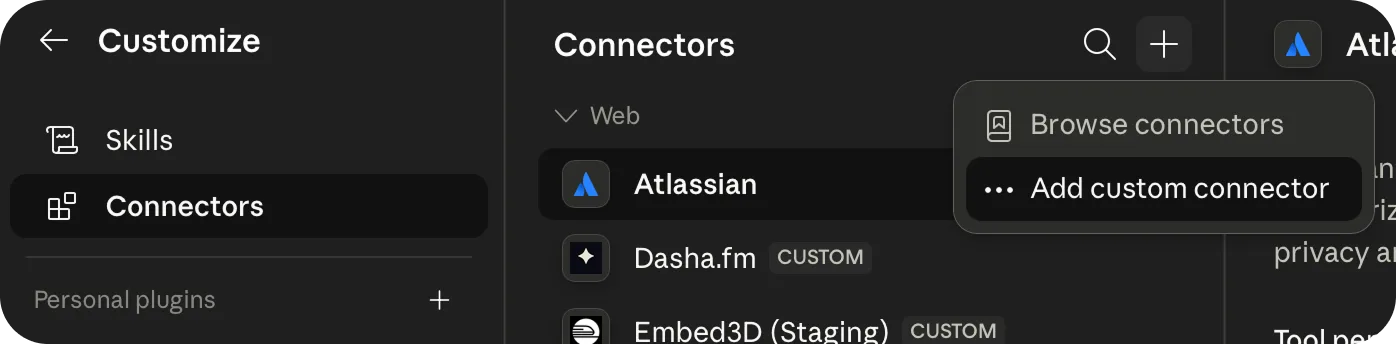
Add a custom connector
On the Connectors page, click the + in the top-right corner and select Add custom connector.
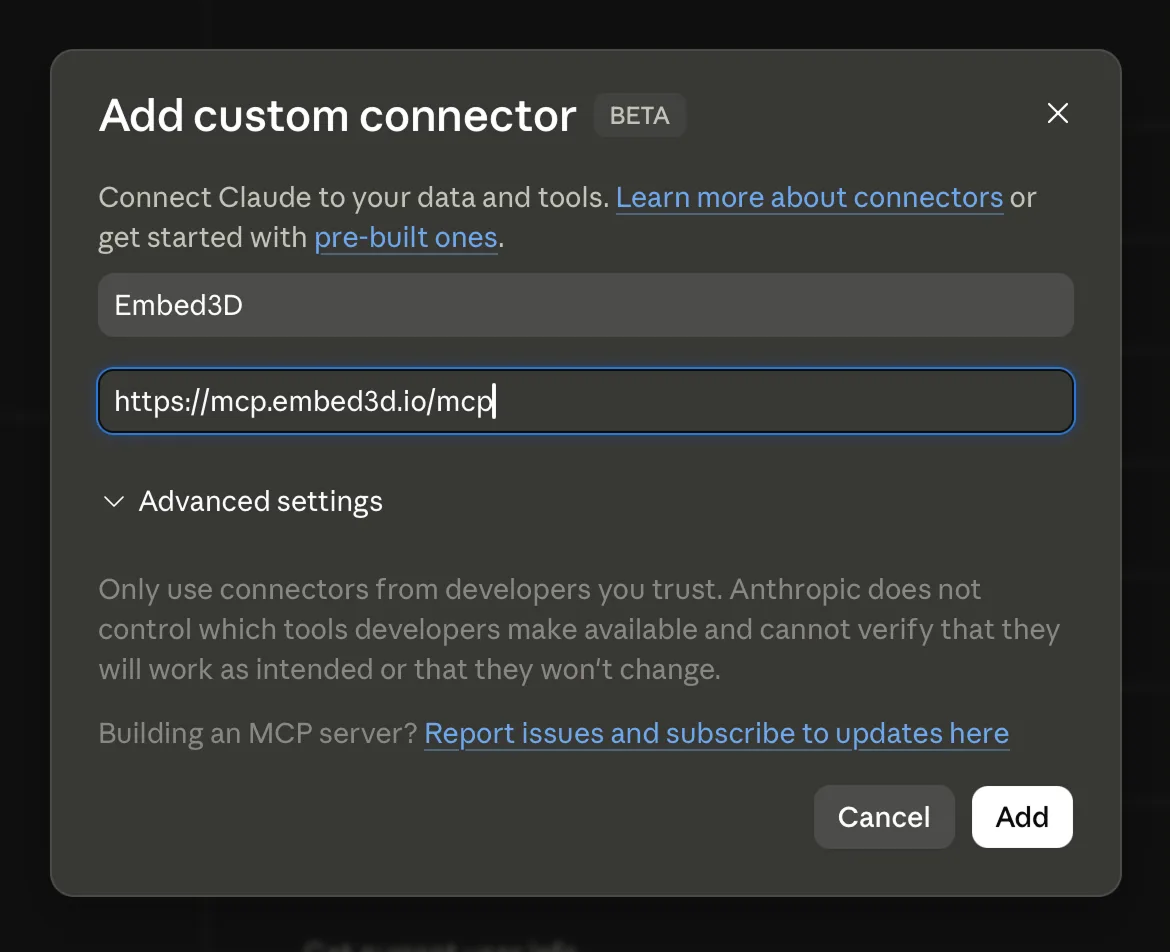
Enter the Embed3D server details
Name the connector Embed3D and paste the MCP server URL:
https://mcp.embed3d.io/mcp
then click Add.
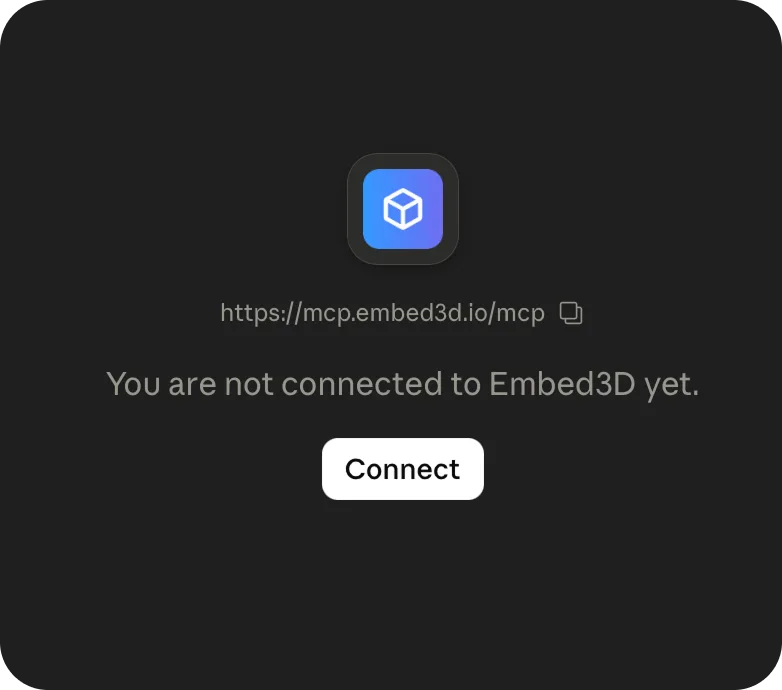
Connect your account
The new Embed3D connector shows as not connected yet. Click Connect to start the sign-in flow.
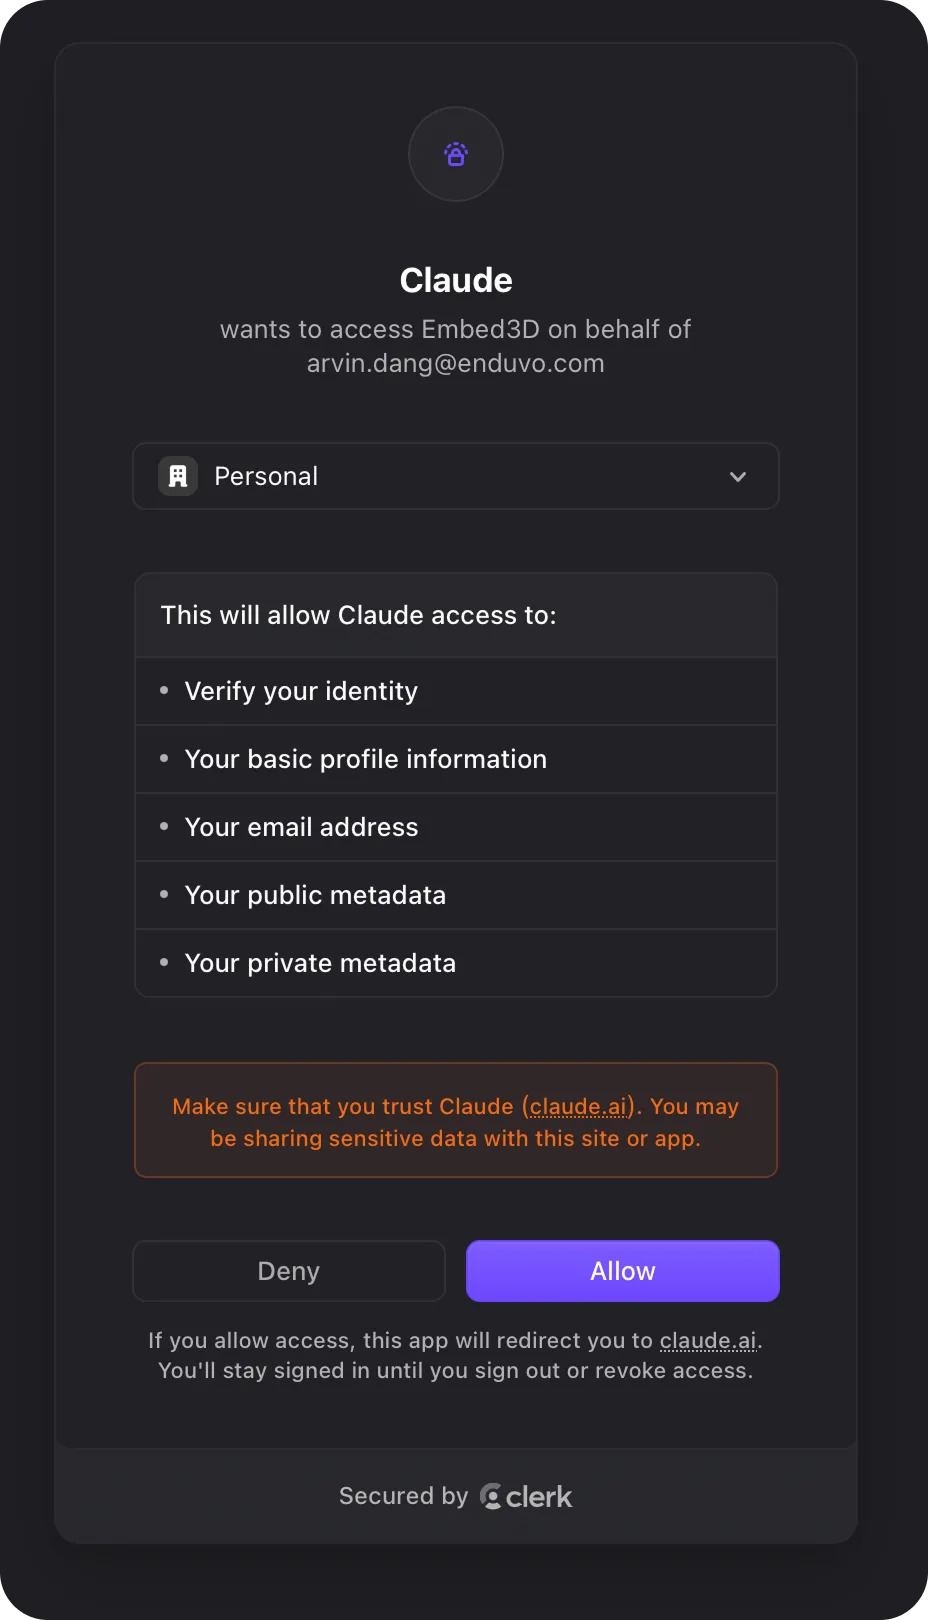
Approve access
Sign in with your Embed3D account, review the requested permissions, and click Allow. Claude only sees the workspace you sign into.
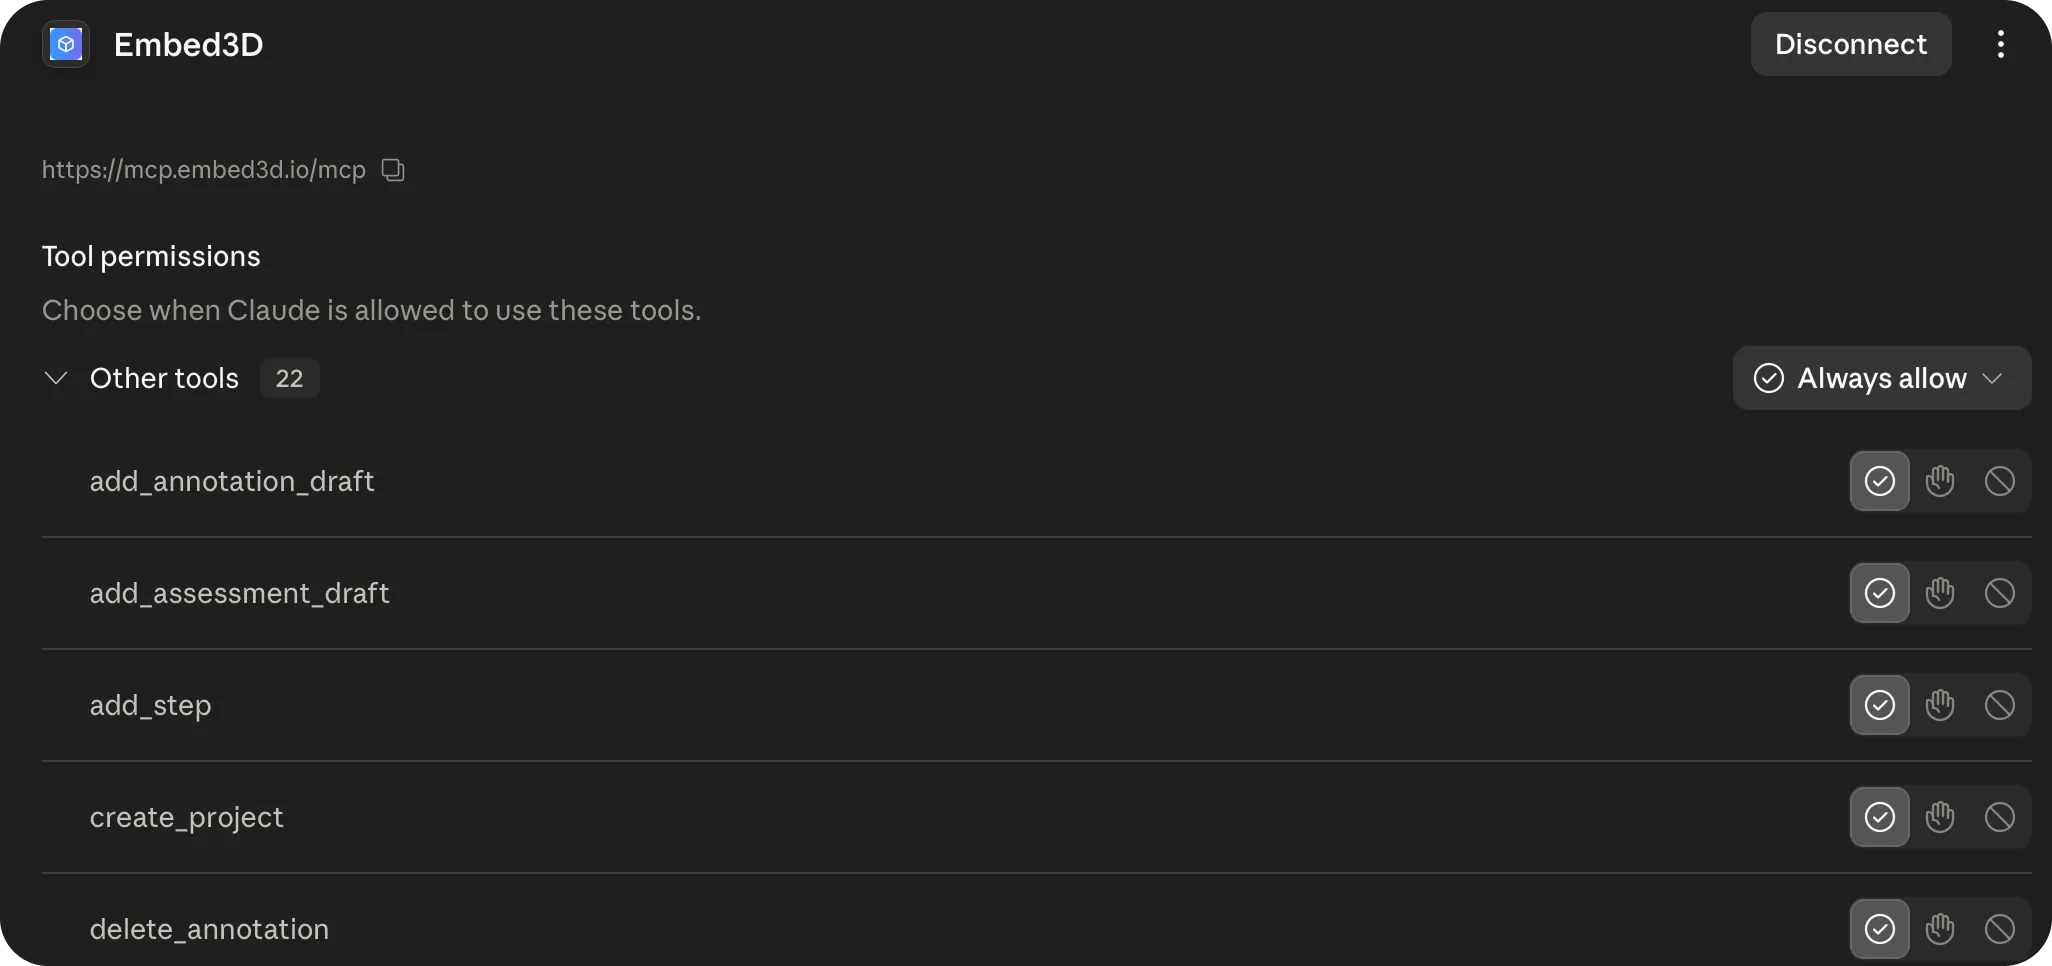
Review tool permissions
Embed3D is now connected. You can review each tool Claude is allowed to use and set Always allow so you're not prompted on every action.
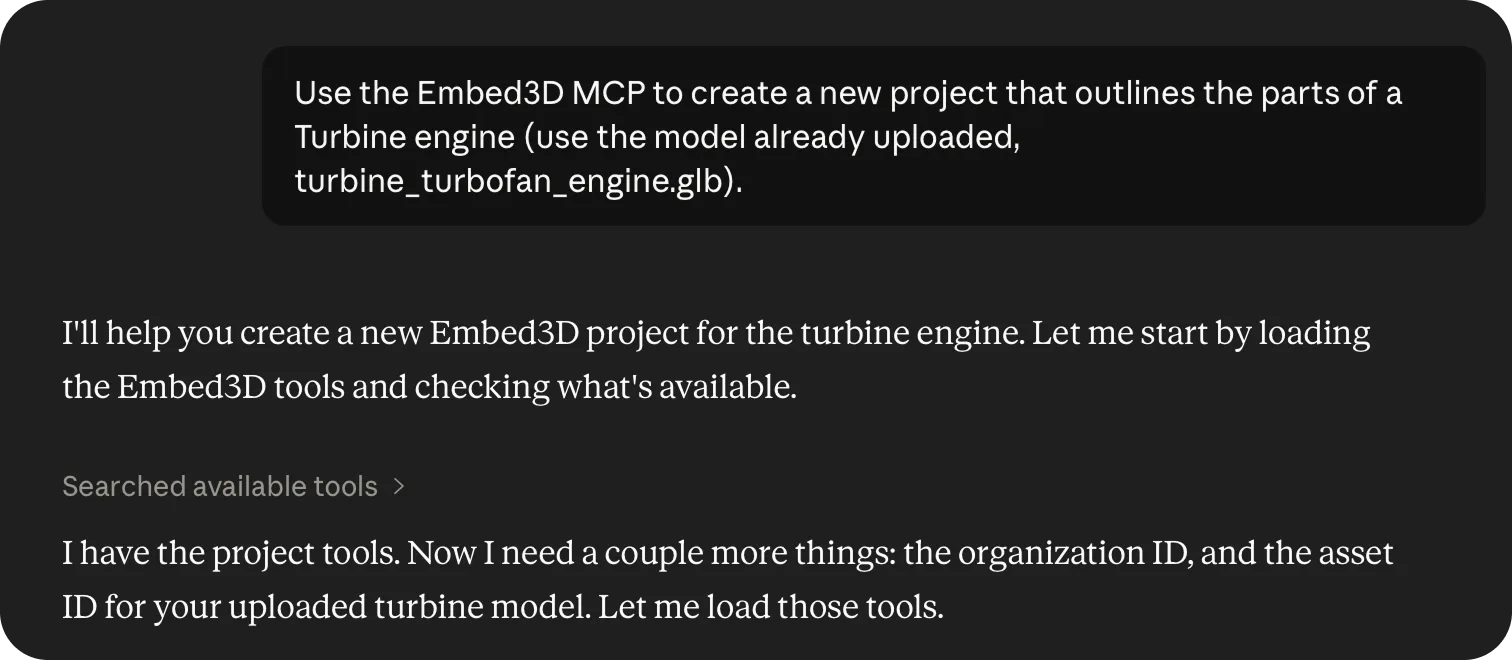
Ask Claude to build something
In a new chat, give Claude a goal — for example: "Use the Embed3D MCP to create a new project that outlines the parts of a turbine engine (use the model already uploaded, turbine_turbofan_engine.glb)."
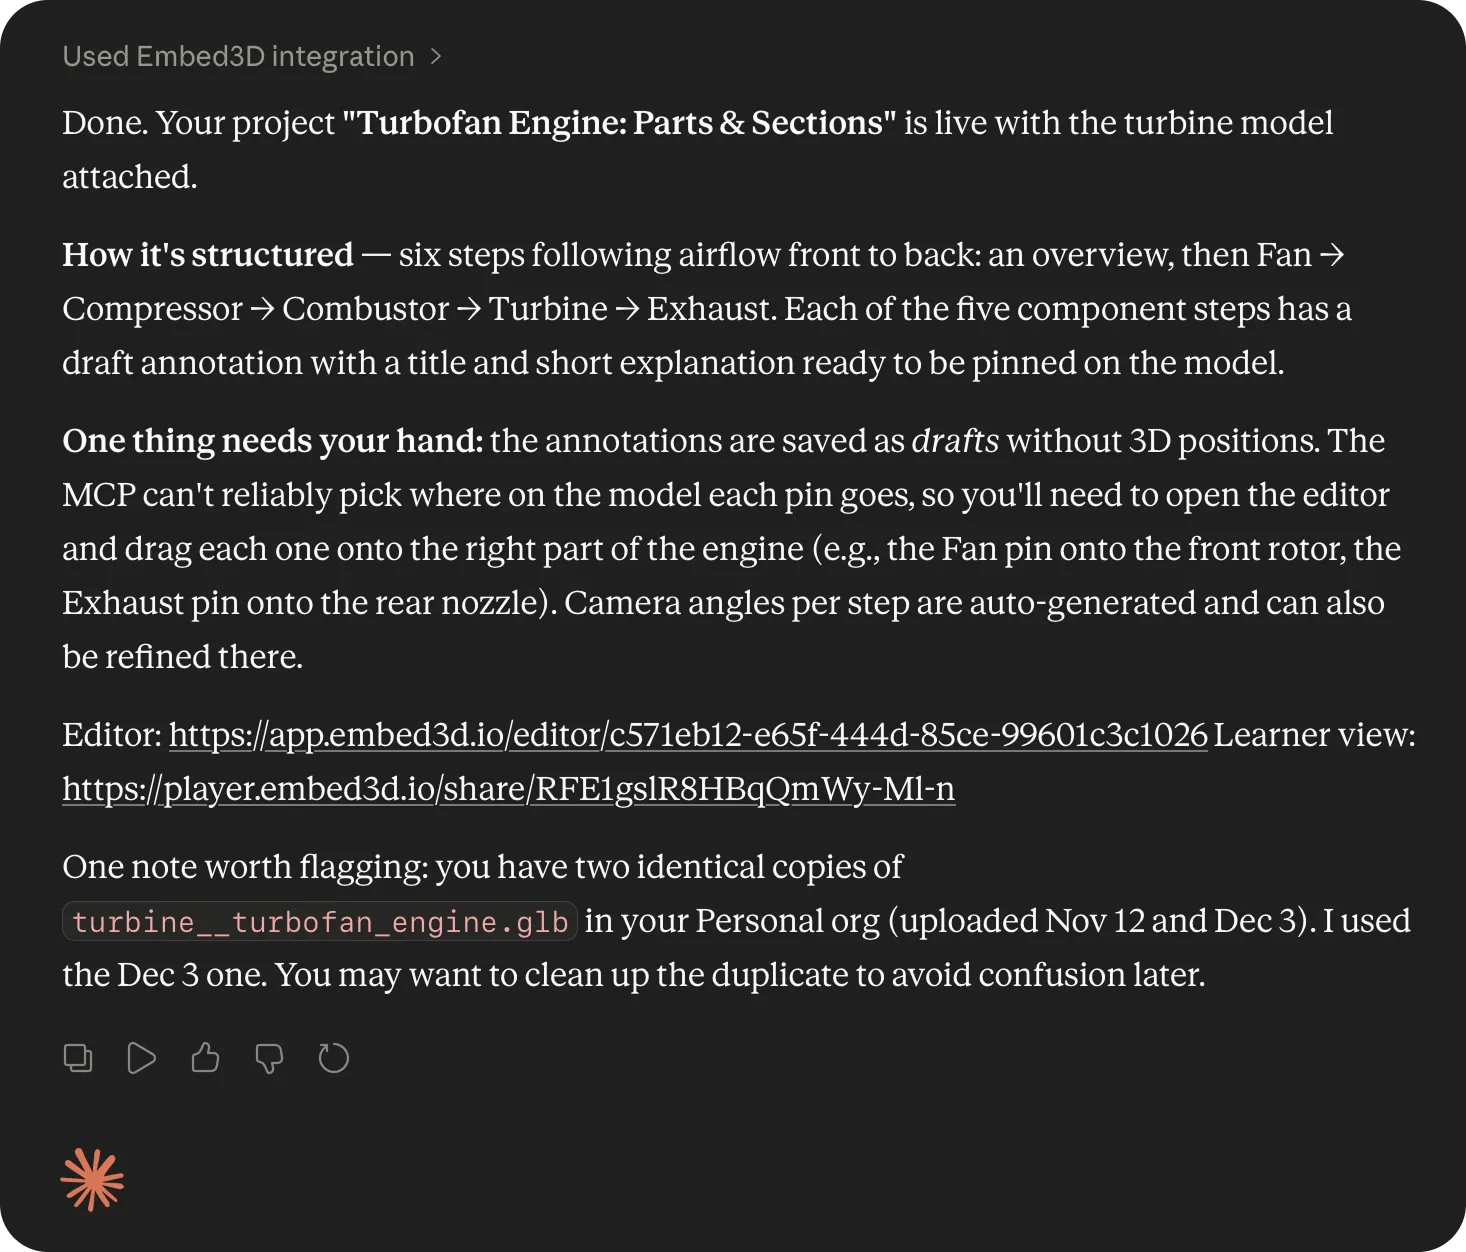
Review the result, then finish in the editor
Claude builds the project — steps, titles, and explainer text — and saves annotations as drafts. It returns editor and learner-view links so you can hop in, place the pins, and refine.
What Claude can do
- Projects: list, create, rename, and archive projects in your workspace.
- Assets: start a new project from any sample asset or any 3D model you've previously uploaded.
- Lessons: draft a full step sequence — titles, explainer text, and annotation drafts — in a single prompt.
- Assessments: propose pin-and-match assessment items tied to specific steps.
🎯 Where you take over
Review, validation, and placement happen inside the editor:
- 3D orientation per step. Open each step in the editor and position the model how you want it.
- Annotation Queue. Annotations that Claude drafts arrive in an Annotation Queue on each step. Open the step, then drop each pin on the part of the model it refers to.
- Assessment Queue. Assessment items work the same way — open the step's Assessment Queue and place the matched pins on the model.
💡 Pro Tips
- Reference an existing project by name — "In my 'Cardiac Anatomy' project, add 3 steps after step 4."
- Ask Claude to list your sample assets first if you're not sure what's available.
- Drafted annotations and assessments are safe — nothing is published until you place the pins and confirm.
- Revoke access any time from Embed3D → Settings → Connected apps or from Claude's Connectors panel.
How to Embed in Articulate 360 Rise
Articulate 360 Rise makes it easy to add interactive 3D content using the built-in code block.
Step-by-Step Instructions
Open Your Articulate 360 Rise
Navigate to the lesson where you want to add your 3D content.
Add a Code Block
Click "+" between sections, select "Code" from the Block Library. Click "Add Code" in the option that appears.
Insert Your Embed Code
Select "Add Code" from the inserted Code section in your lesson. Paste your complete Embed3D iframe code (including both opening and closing <iframe></iframe> tags).
Preview and Publish
Dismiss the Code window with your iframe and preview your lesson. The 3D content will be fully interactive once embedded.
💡 Pro Tips
- Ensure your iframe code is wrapped in
<center>and</center>tags to center the embed.
How to Embed in Articulate 360 Storyline
Add interactive 3D to your Storyline slides using the "Web Object" feature.
Step-by-Step Instructions
Open your Articulate 360 Storyline Course
Navigate to the lesson where you want to add your 3D content.
Add Your Content
Double click on the slide you you want to add your content, select "Insert" on the top ribbon, and click on "Web Object".
Insert your Embed3D Direct Link
In the web address line add your Embed3D "Direct Link" and click on "Test Link".
Publish
Dismiss the "Web Object" screen and publish your lesson. The 3D content will be fully interactive once embedded.
💡 Pro Tips
- The embed may not display during preview mode — this is normal
- Always test in a published environment (web or LMS)
- Match iframe dimensions to your slide size for best results
- This method works for any iframe content, not just videos
How to Embed in Canvas LMS
Add 3D interactive content to your Canvas courses using the Rich Content Editor.
Step-by-Step Instructions
Open the Rich Content Editor
Navigate to the Canvas Page, Assignment, or Discussion where you want to add your 3D content and open the editor.
Switch to HTML Editor
Click the HTML Editor link (usually in the top-right corner of the editor, looks like "</>" or "HTML Editor").
Paste Your Embed Code
Insert your Embed3D iframe code directly into the HTML editor. Example: <iframe width="100%" height="520" src="..." ></iframe>
Save and Preview
Click "Save" or switch back to the Rich Content Editor view. Your 3D content will be fully interactive once saved.
💡 Pro Tips
- Canvas allows iframes by default in most configurations
- If iframes don't work, contact your Canvas administrator to enable iframe support
- Use width="100%" for responsive embeds that adapt to different screen sizes
- You can embed in Pages, Assignments, Discussions, Quizzes, and Syllabus areas
Where to Find 3D Assets
Looking for 3D models to use with Embed3D? Here are the top platforms offering free and premium 3D assets.
Sketchfab
A community-driven platform with millions of 3D models available under Creative Commons and royalty-free licenses. Perfect for e-learning, VR/AR, and interactive 3D experiences.
Visit Sketchfab →CGTrader
A prominent marketplace with over 260,000 free 3D models available for download. Ideal for gaming, animation, architecture, and engineering projects.
Visit CGTrader →TurboSquid
One of the largest platforms for professional-grade 3D assets. Offers both free and premium models with strict quality control standards for VFX, advertising, and architectural visualization.
Visit TurboSquid →Free3D
Over 17,000 free models organized by category, including rigged, animated, and low-poly assets. Great for 3D artists, game developers, and architects.
Visit Free3D →3DMAXTER
Thousands of high-quality 3D assets including furniture, lighting, vehicles, and architectural components. No registration required. Supports major formats like OBJ, FBX, and STL.
Visit 3DMAXTER →Thingiverse
The largest community for 3D printable designs with millions of free, user-generated models under Creative Commons licenses. Perfect for STEM education and maker projects.
Visit Thingiverse →💡 Tips for Using 3D Assets
- Always check the license terms before using any 3D model in your projects
- Look for models in common formats like GLTF or GLB for best compatibility
- Consider the polygon count — lower poly models perform better in web-based 3D applications, and try to keep file sizes at or below 50mb.
- Many platforms allow you to preview models in 3D before downloading